LINE Bot template with Google Gemini Pro


如何快速架設在自己平台
請根據以下的流程,來直接透過開源的程式碼來架設一個 LINEBot 跟 GCP STT 與 GCS (Google Cloud Storage) 的結合。
事前準備
開始部署
- Google Cloud Platform 佈署

- 除了填寫 App Name 以外,以下的參數必須要填入才能完整運行。
- ChannelAccessToken: 請到 LINE Developers Console issue 一個。
- ChannelSecret: 請到 LINE Developers Console 拿一個。
- GOOGLE_GEMINI_API_KEY: 必需要透過 Google Gemini API Keys 來取得。
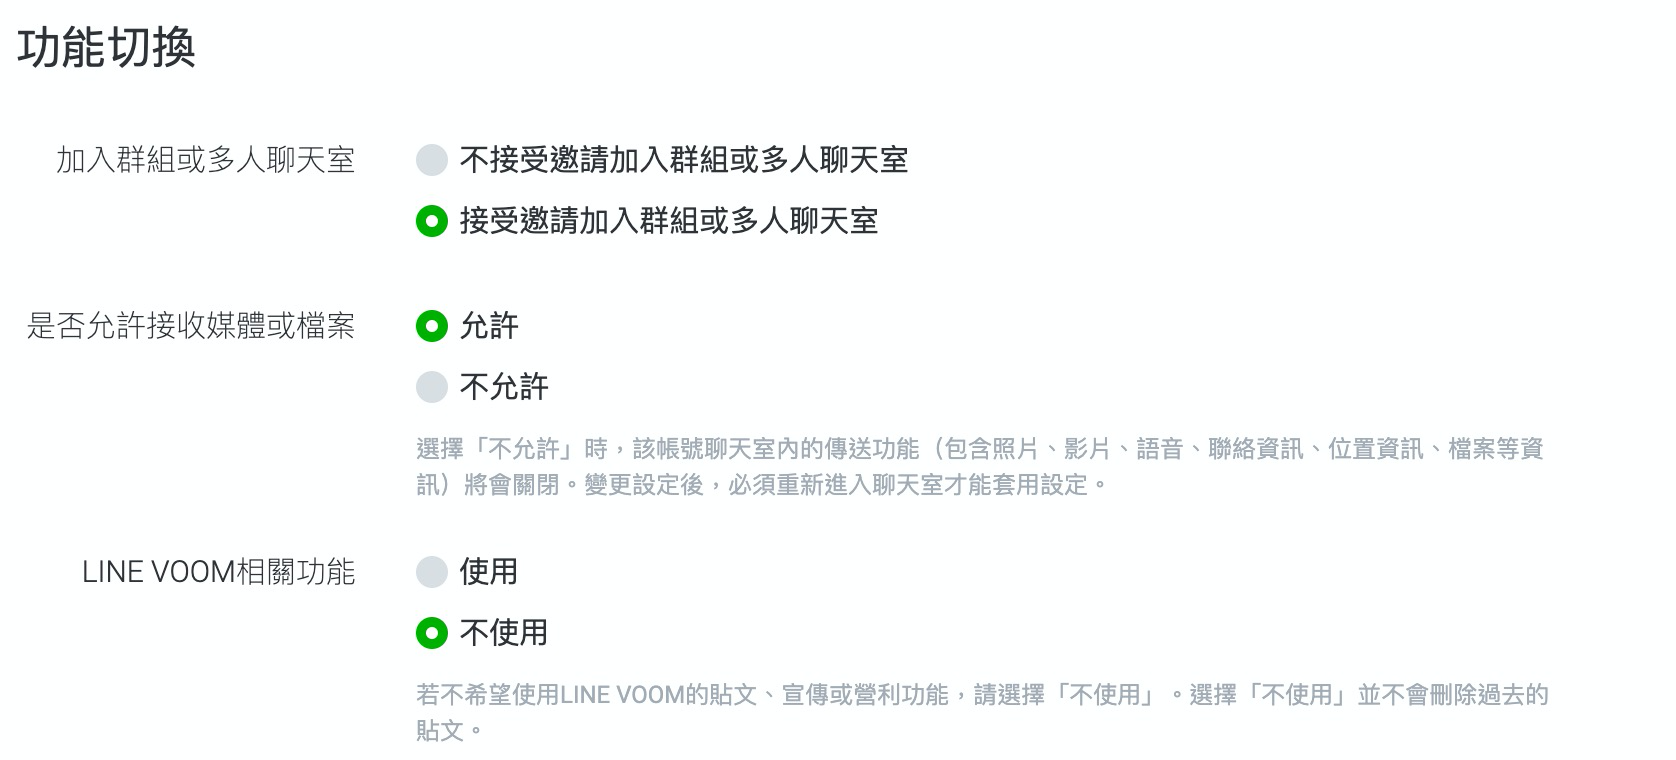
- 請到 LINE 官方帳號的平台,到了右上角的「設定」中,選擇「帳號設定」
-
將你官方帳號基本資料設定好,並且打開加入群組功能。

-
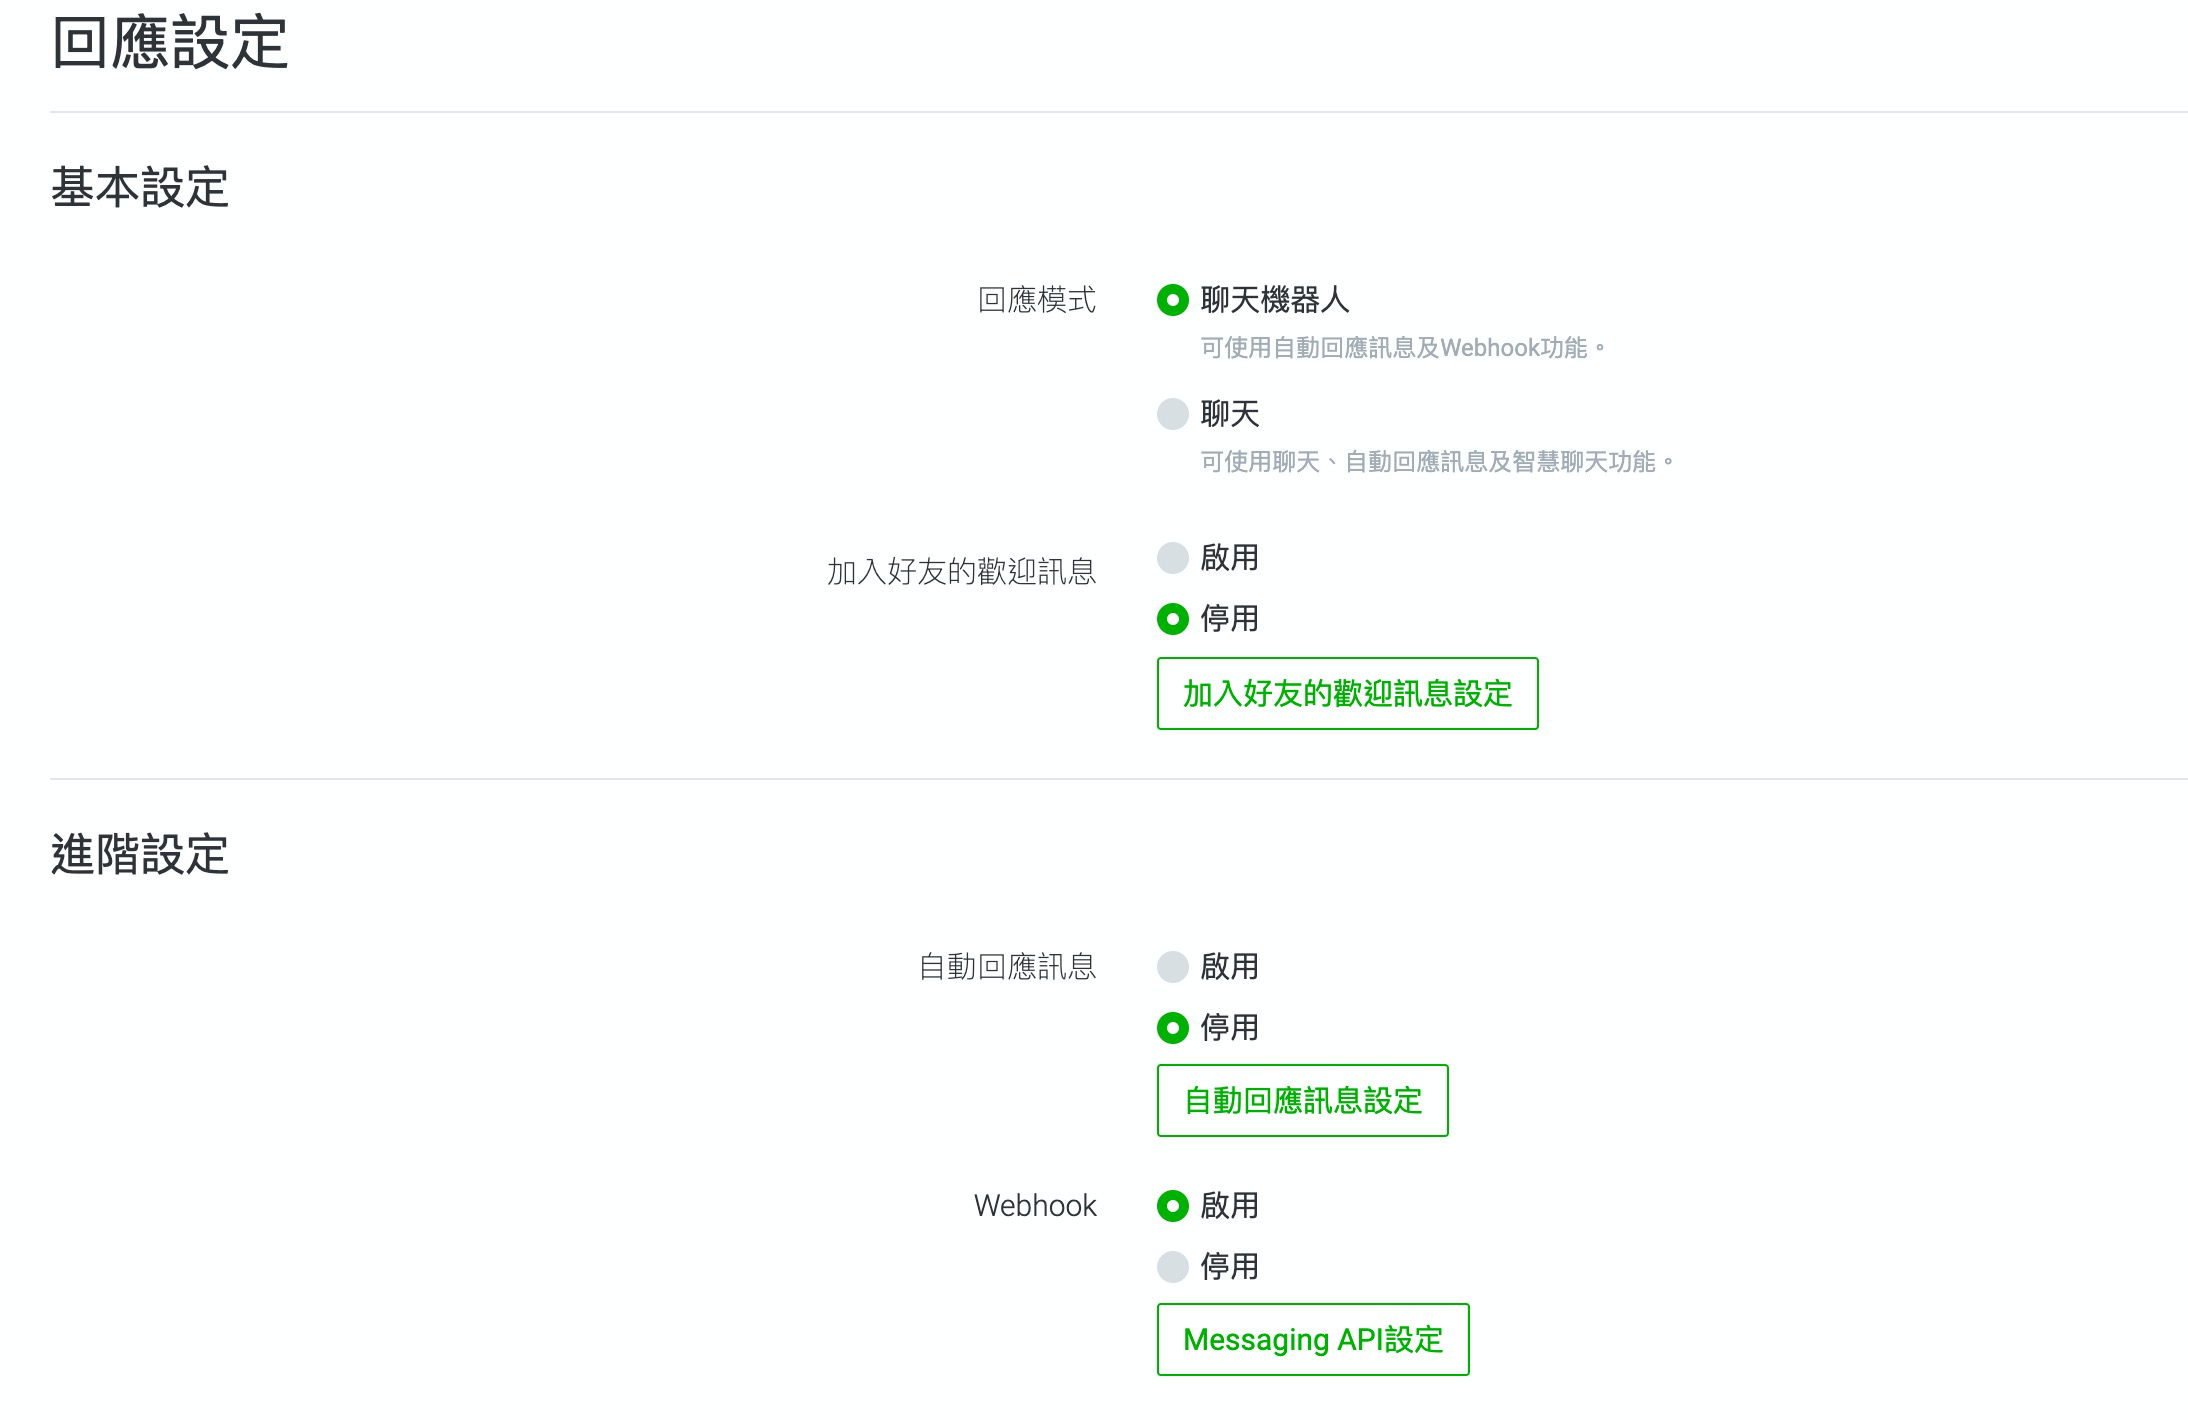
到回應設定,將以下設定改好:

- 回應模式改成「聊天機器人」
- 停用「自動回應訊息」
- 啟用「Webhook」
-
到 Messaging API 選項,將 Webhook 網址填入: https://{YOUR_HEROKU_SERVER_ID}.herokuapp.com/callback
-
關於如何快速部署的流程,可以參考另外一篇文章內的影片:
如何使用
- 打開聊天機器人
- 直接打字: 透過文字直接跟 Gemini Pro 溝通 (透過 Gemini Pro Chat)。
- 傳送圖片: 直接辨識圖片內容,目前的想法是透過比較科學化的角度來說明。
- 重設機器人: 輸入
reset 透過這個功能,可以重設機器人的狀態,讓機器人重新回到初始狀態。

完整開發教學
使用 Docker 部署
pre-requisite: domain name, SSL certificate
-
建立 docker image
docker build -t linebot-gemini-pro-gcp:latest .
-
填寫 docker-compose.yml
- ChannelAccessToken: 請到 LINE Developers Console issue 一個。
- ChannelSecret: 請到 LINE Developers Console 拿一個。
- GOOGLE_GEMINI_API_KEY: 必需要透過 Google Gemini API Keys 來取得。
- YOUR_PORT: 請填入你想要的 port
-
到 Messaging API 選項,將 Webhook 網址填入: https://{YOUR_DOMAIN_NAME}/callback
License
Licensed under the Apache License, Version 2.0 (the "License");
you may not use this file except in compliance with the License.
You may obtain a copy of the License at
http://www.apache.org/licenses/LICENSE-2.0
Unless required by applicable law or agreed to in writing, software
distributed under the License is distributed on an "AS IS" BASIS,
WITHOUT WARRANTIES OR CONDITIONS OF ANY KIND, either express or implied.
See the License for the specific language governing permissions and
limitations under the License.
 Documentation