coldbrew-cli
NOTE: Unfortunately, coldbrew-cli is not actively maintained at the moment. ecs-cli could be an option instead.
Objectives
coldbrew-cli can provide
- faster access to ECS (jumpstart with little knowledge on AWS specifics)
- lower maintenance costs (most cases you don't even need AWS console or SDK)
- lessen mistakes by removing boring repetitions
- easier integration with CI
Features
- ECS cluster with EC2 Auto Scaling Group configured
- Support ELB Application Load Balance (multiple app instances on a single EC2 instance)
- Logging: most of Docker logging drivers and AWS CloudWatch Logs
Getting Started
- Download CLI executable (
coldbrew or coldbrew.exe) and put it in your $PATH.
- Configure AWS credentials, region, and VPC through environment variables or CLI Flags.
- Make sure you have docker installed in your system. You will also need Dockerfile for your application if you want to build Docker image using coldbrew-cli.
Core Concepts
coldbrew-cli operates on two simple concepts: applications (apps) and clusters.
- An app is the minimum deployment unit.
- One or more apps can run in a cluster, and, they share the computing resources.
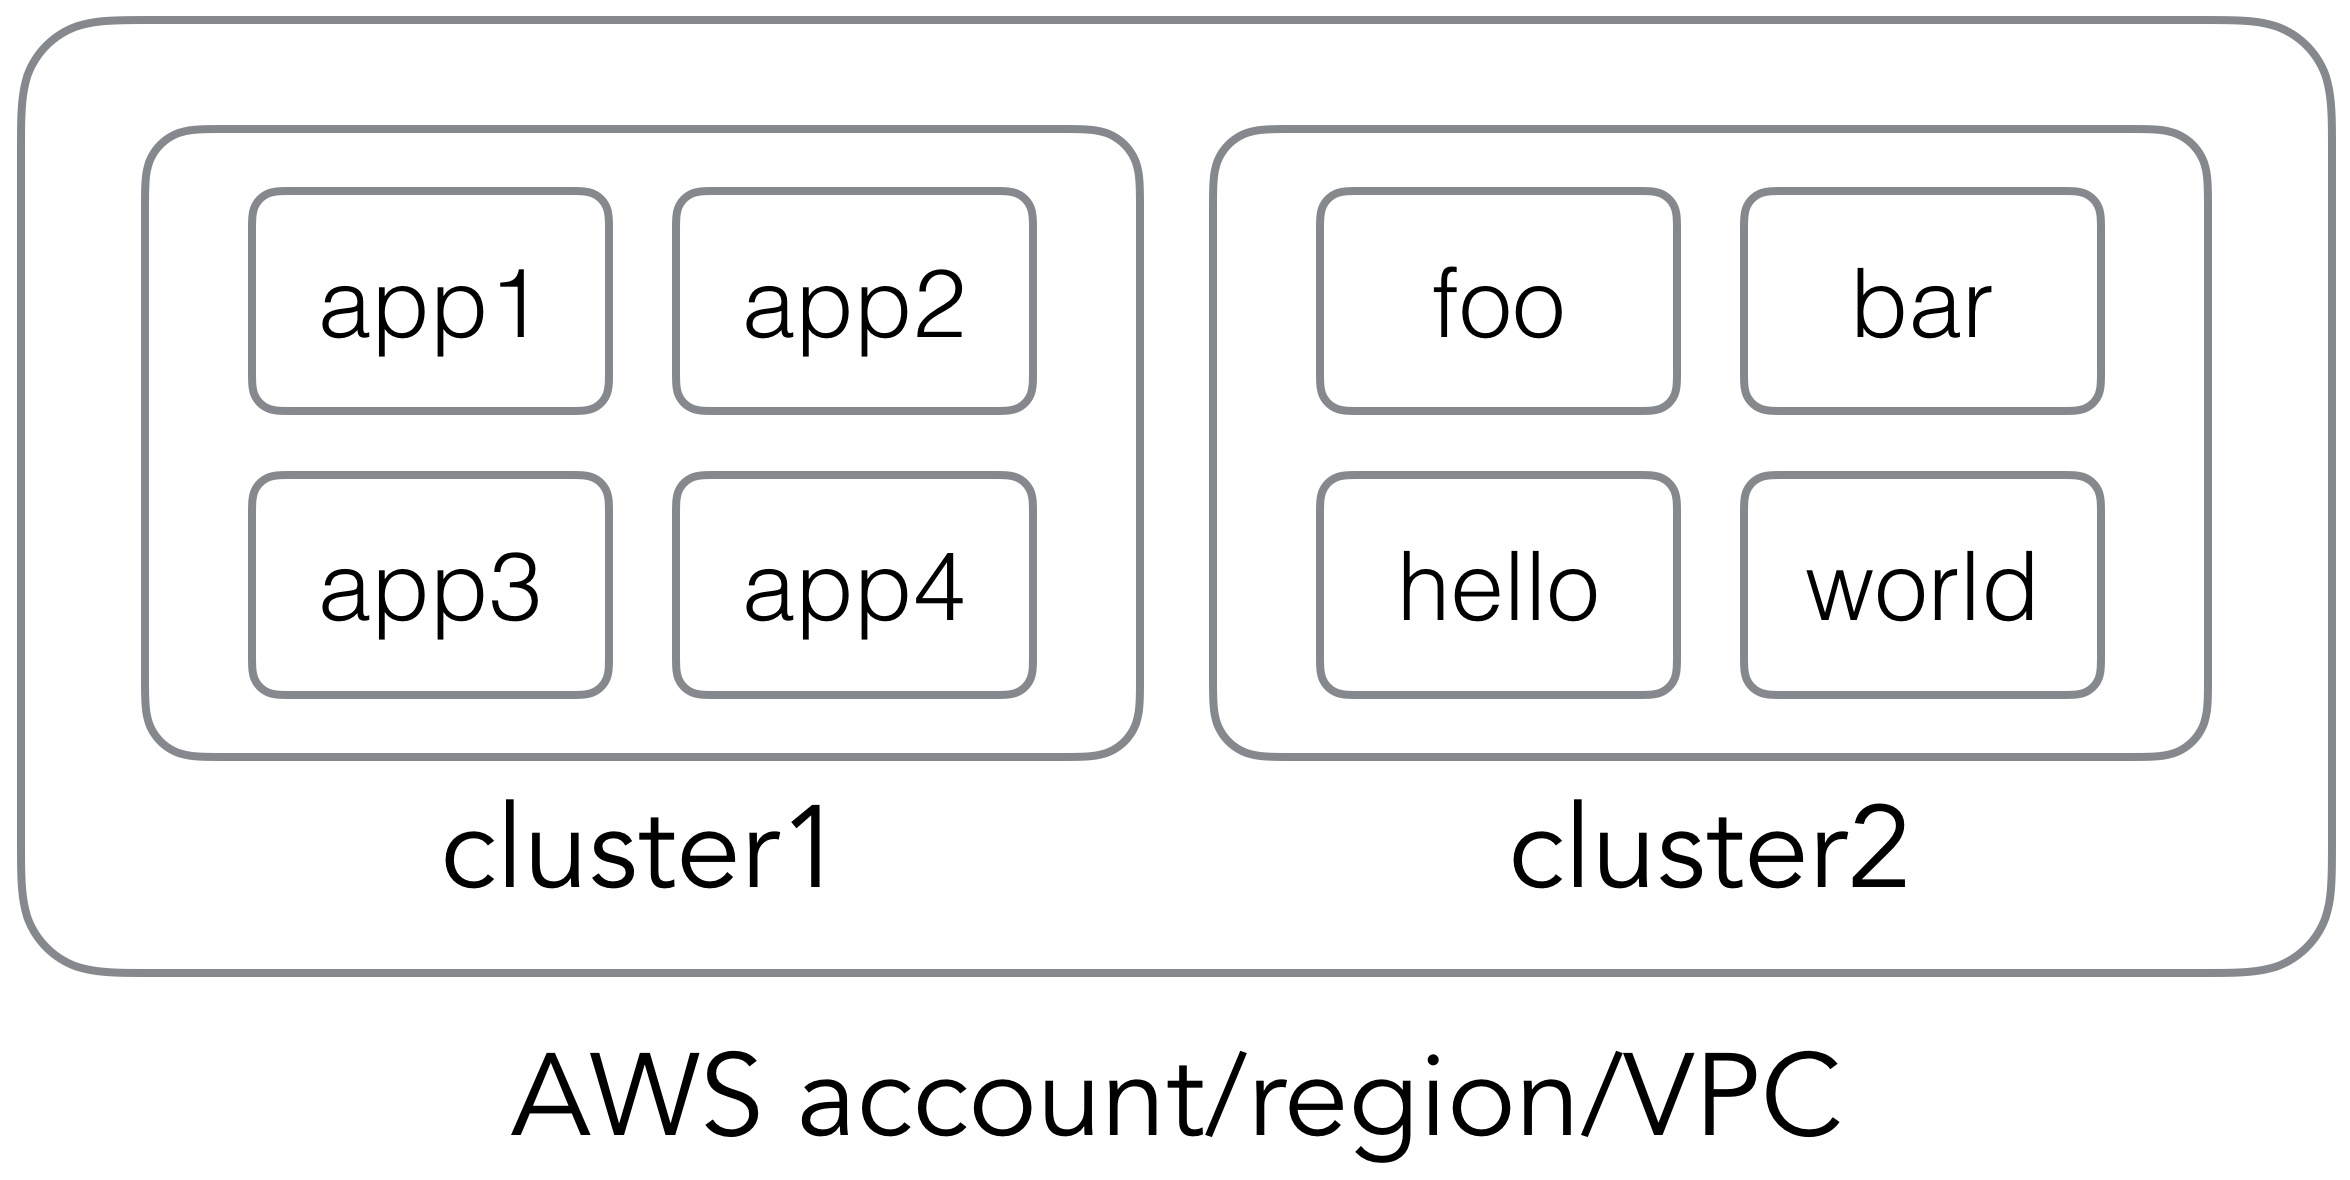
This is what a typical deployment workflow might look like:
- Create new cluster (See: cluster-create)
- Create app configuration (See: init)
- Development iteration:
- Delete app and its resources (See: delete )
- Delete cluster and its resources (See: cluster-delete)
See Concepts for more details.
Tutorials
Check out tutorials:
Core Functions
Create Cluster
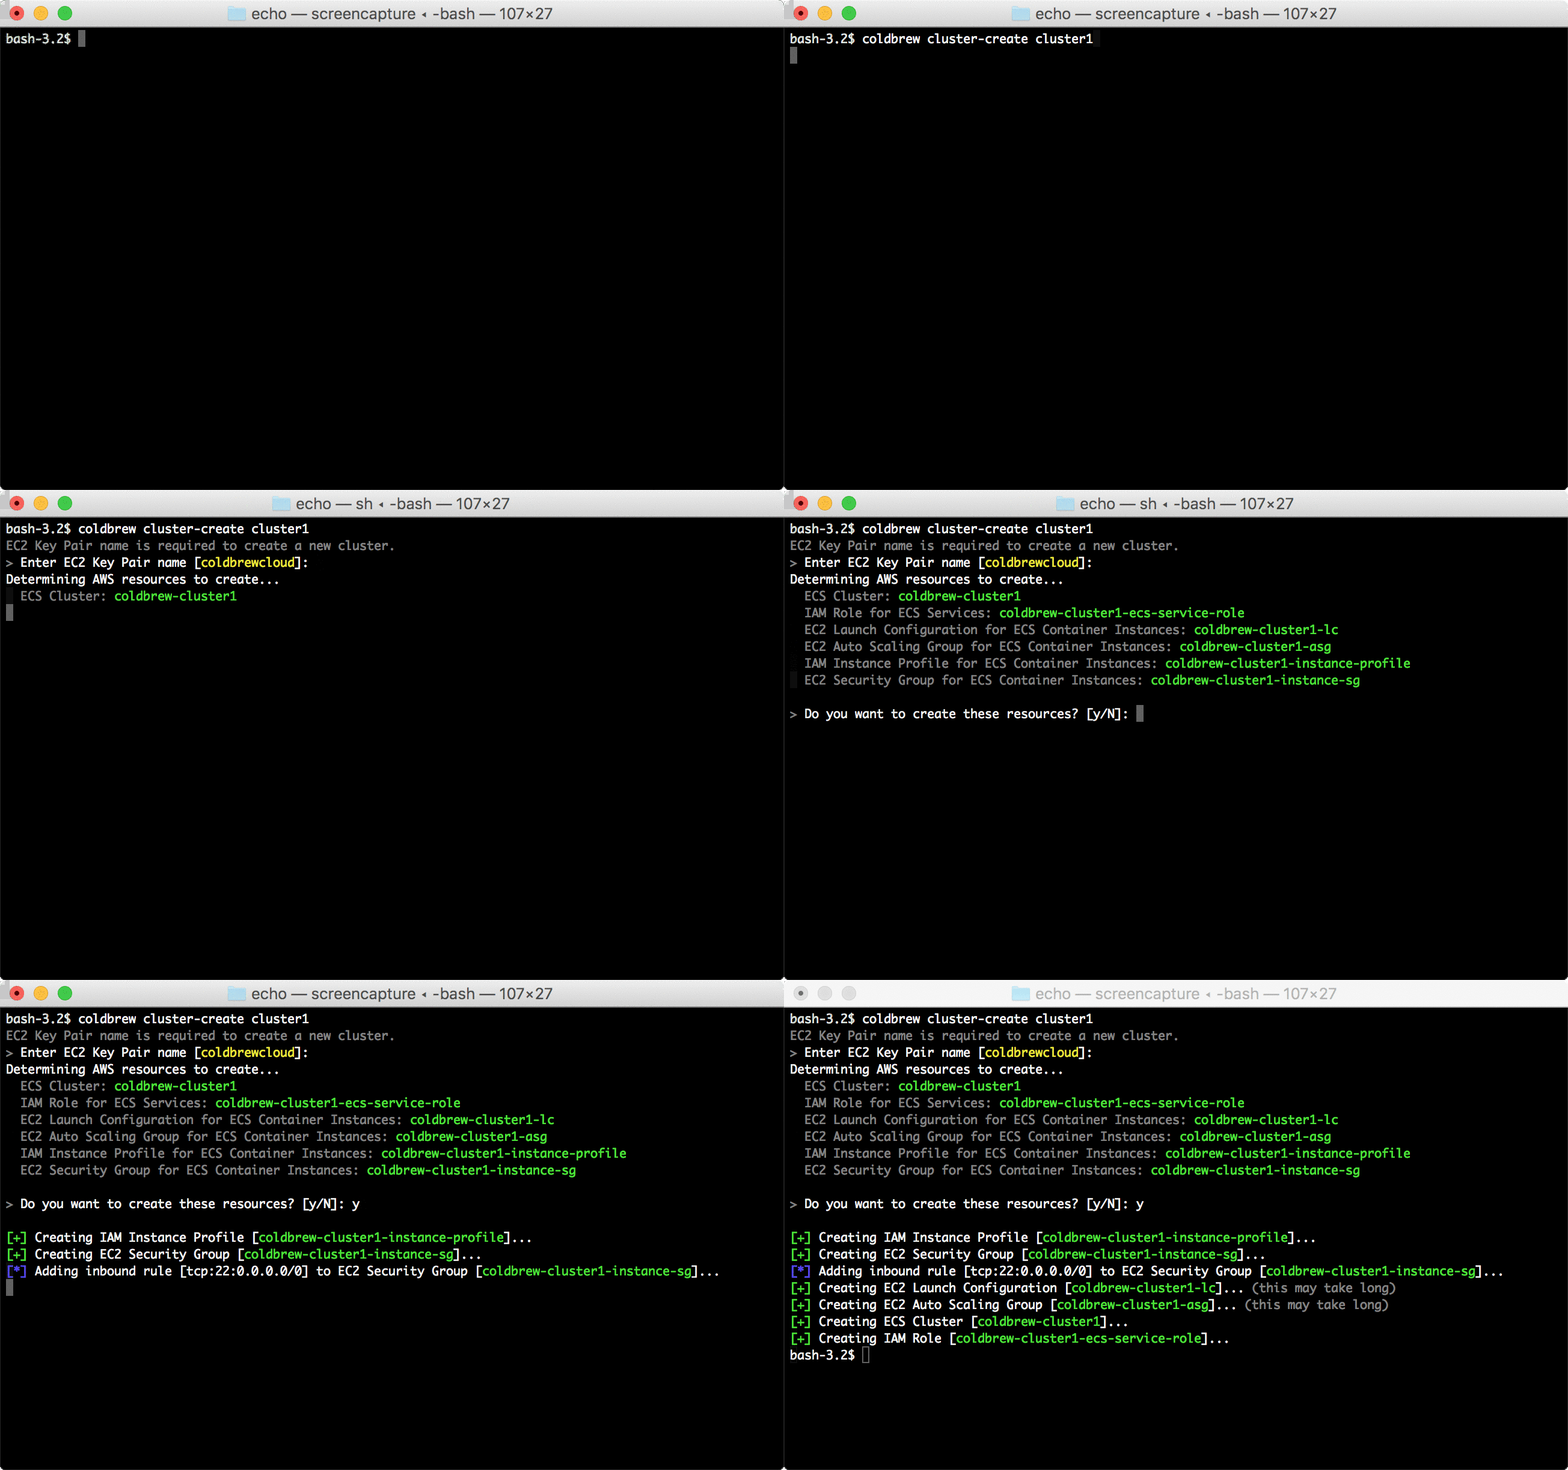
To start deploying your applications, you need to have at least one cluster set up.
coldbrew cluster-create {cluster-name}
cluster-create command will look into your current AWS environment, and, will perform all necessary changes to build the cluster. Note that it can take several minutes until all Docker hosts (EC2 instances) become fully available in your cluster. Use cluster-status command to check the status. You can also adjust the cluster's computing capacity using cluster-scale command.
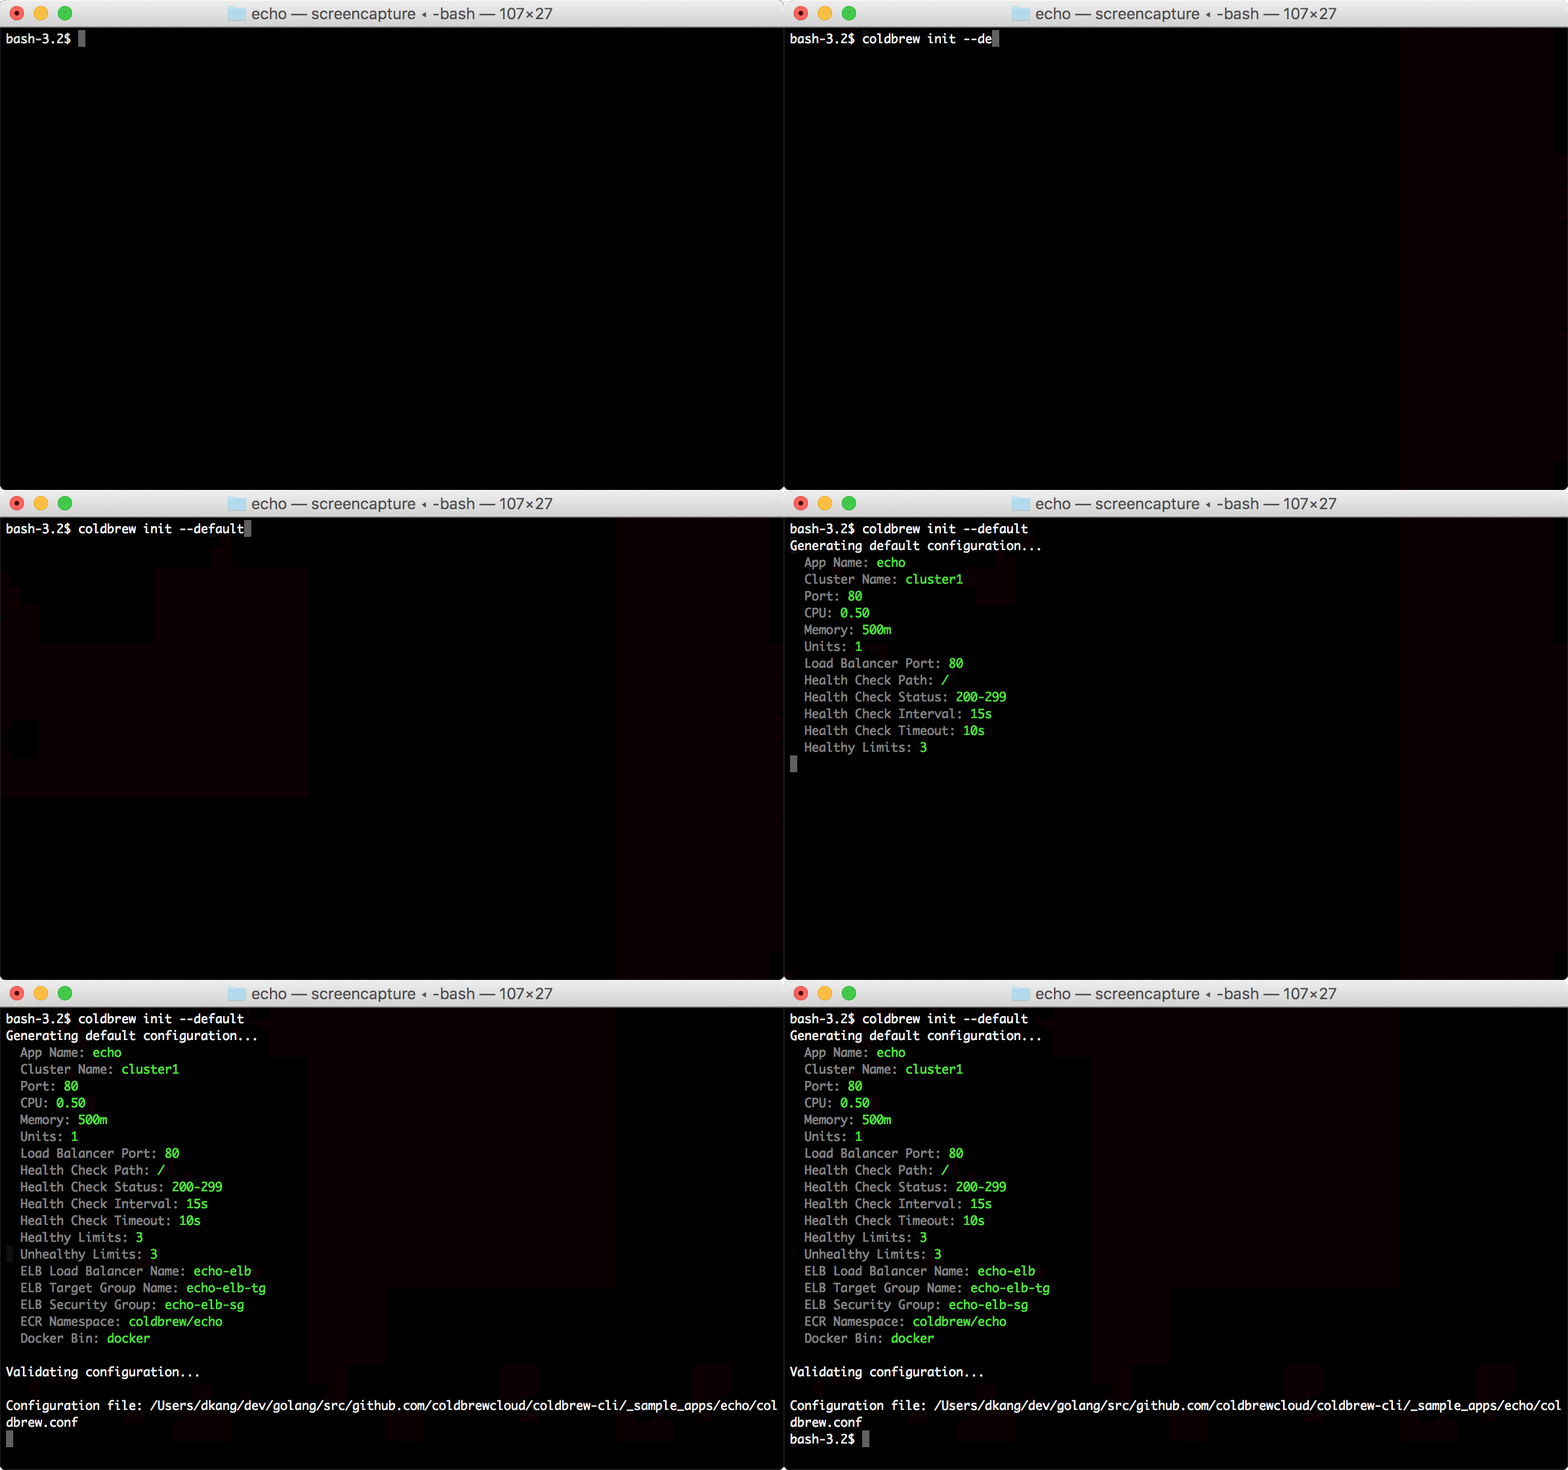
The next step is prepare the app configuration file.
coldbrew init --default
You can manually create/edit your configuration file, or, you can use init command to generate a proper default configuraiton.
Deploy App
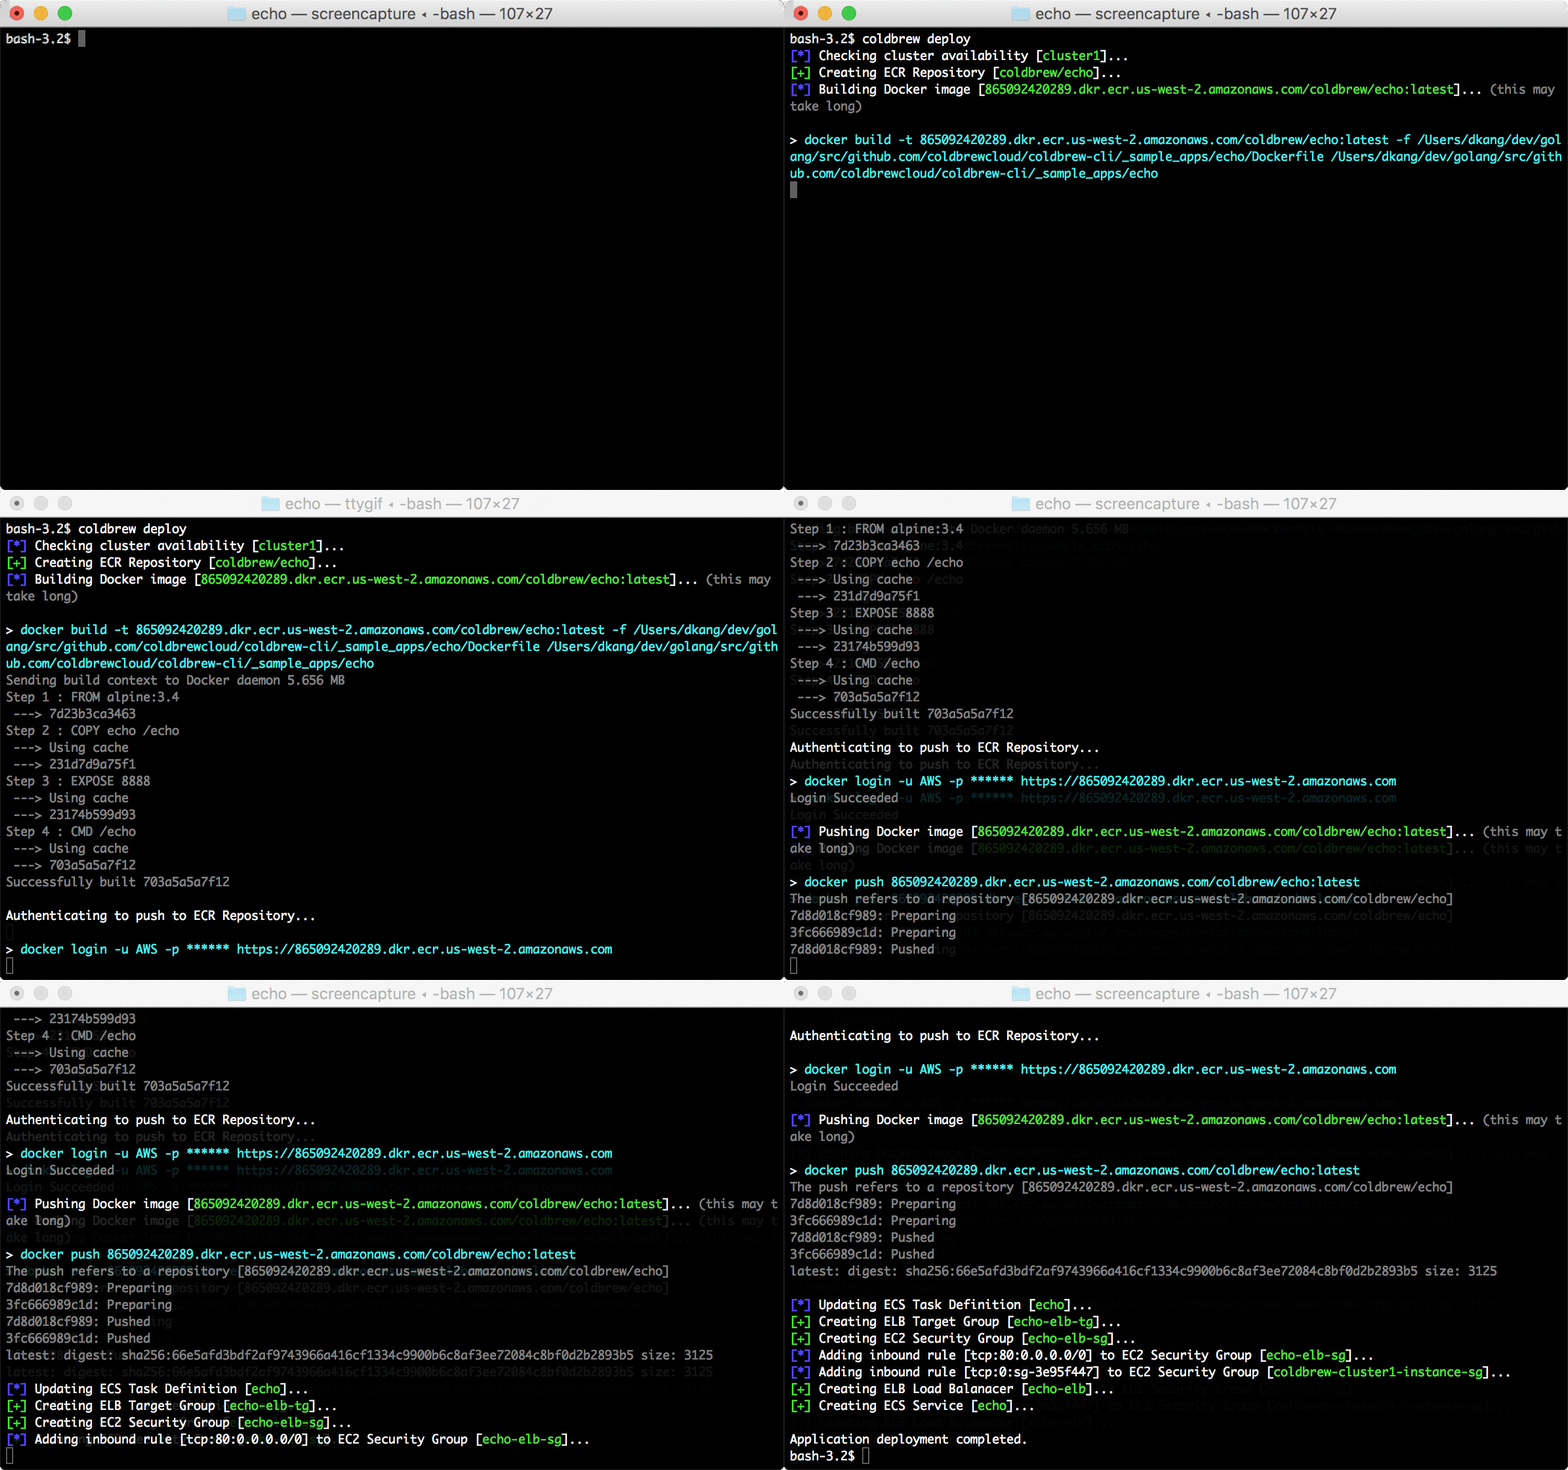
Once the configuration file is ready, now you can deploy your app in the cluster.
coldbrew deploy
Basically deploy command does:
- build Docker image using your
Dockerfile (but this is completely optional if provide your own local Docker image; see --docker-image flag)
- push Docker image to a remote repository (ECR)
- analyze the current AWS environment and setup, and, perform all necessary changes to initiate ECS deployments
Then, within a couple minutes (mostly less than a minute), you will see your new application units up and running.
Check Status
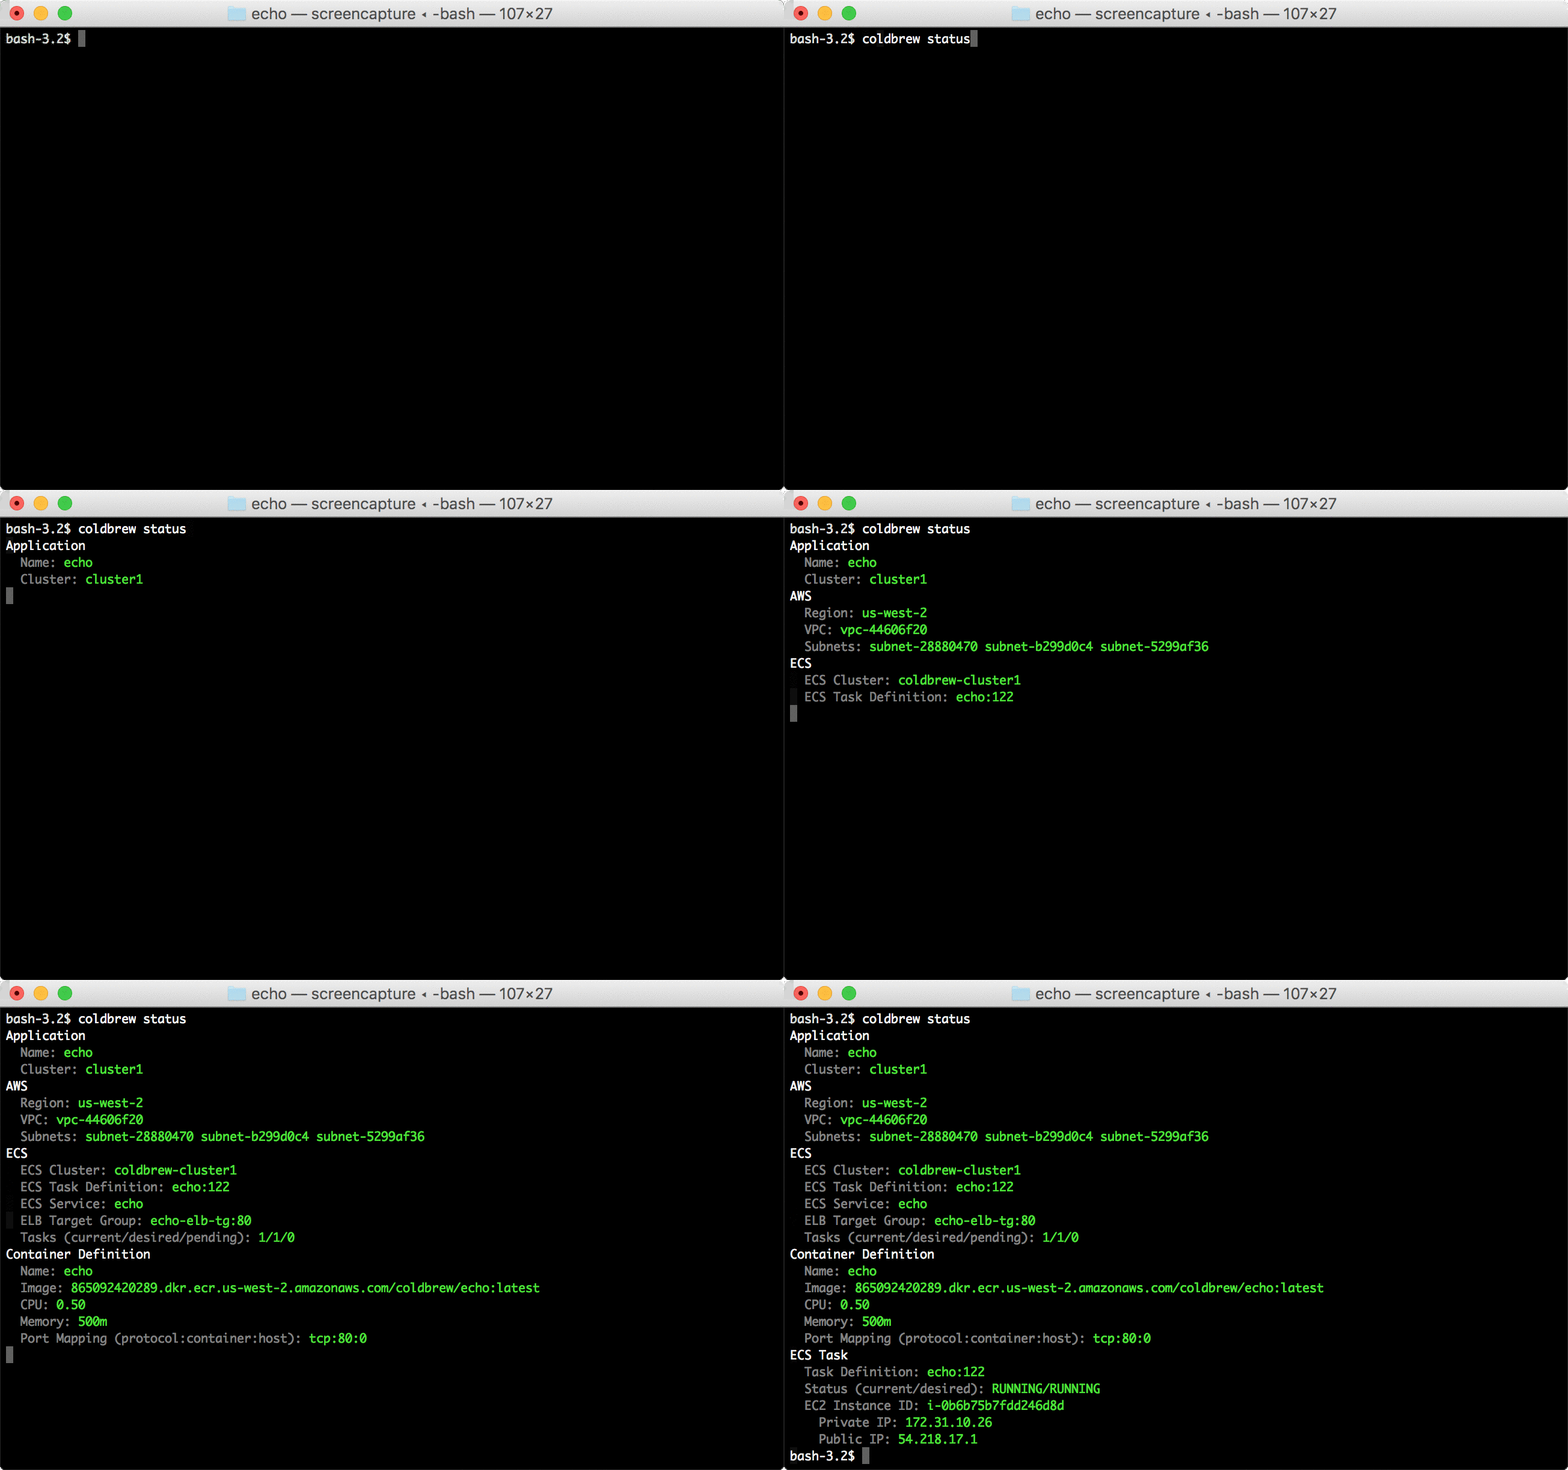
You can use status and cluster-status commands to check the running status of your app and cluster respectively.
coldbrew status
coldbrew cluster-status {cluster-name}

Delete App
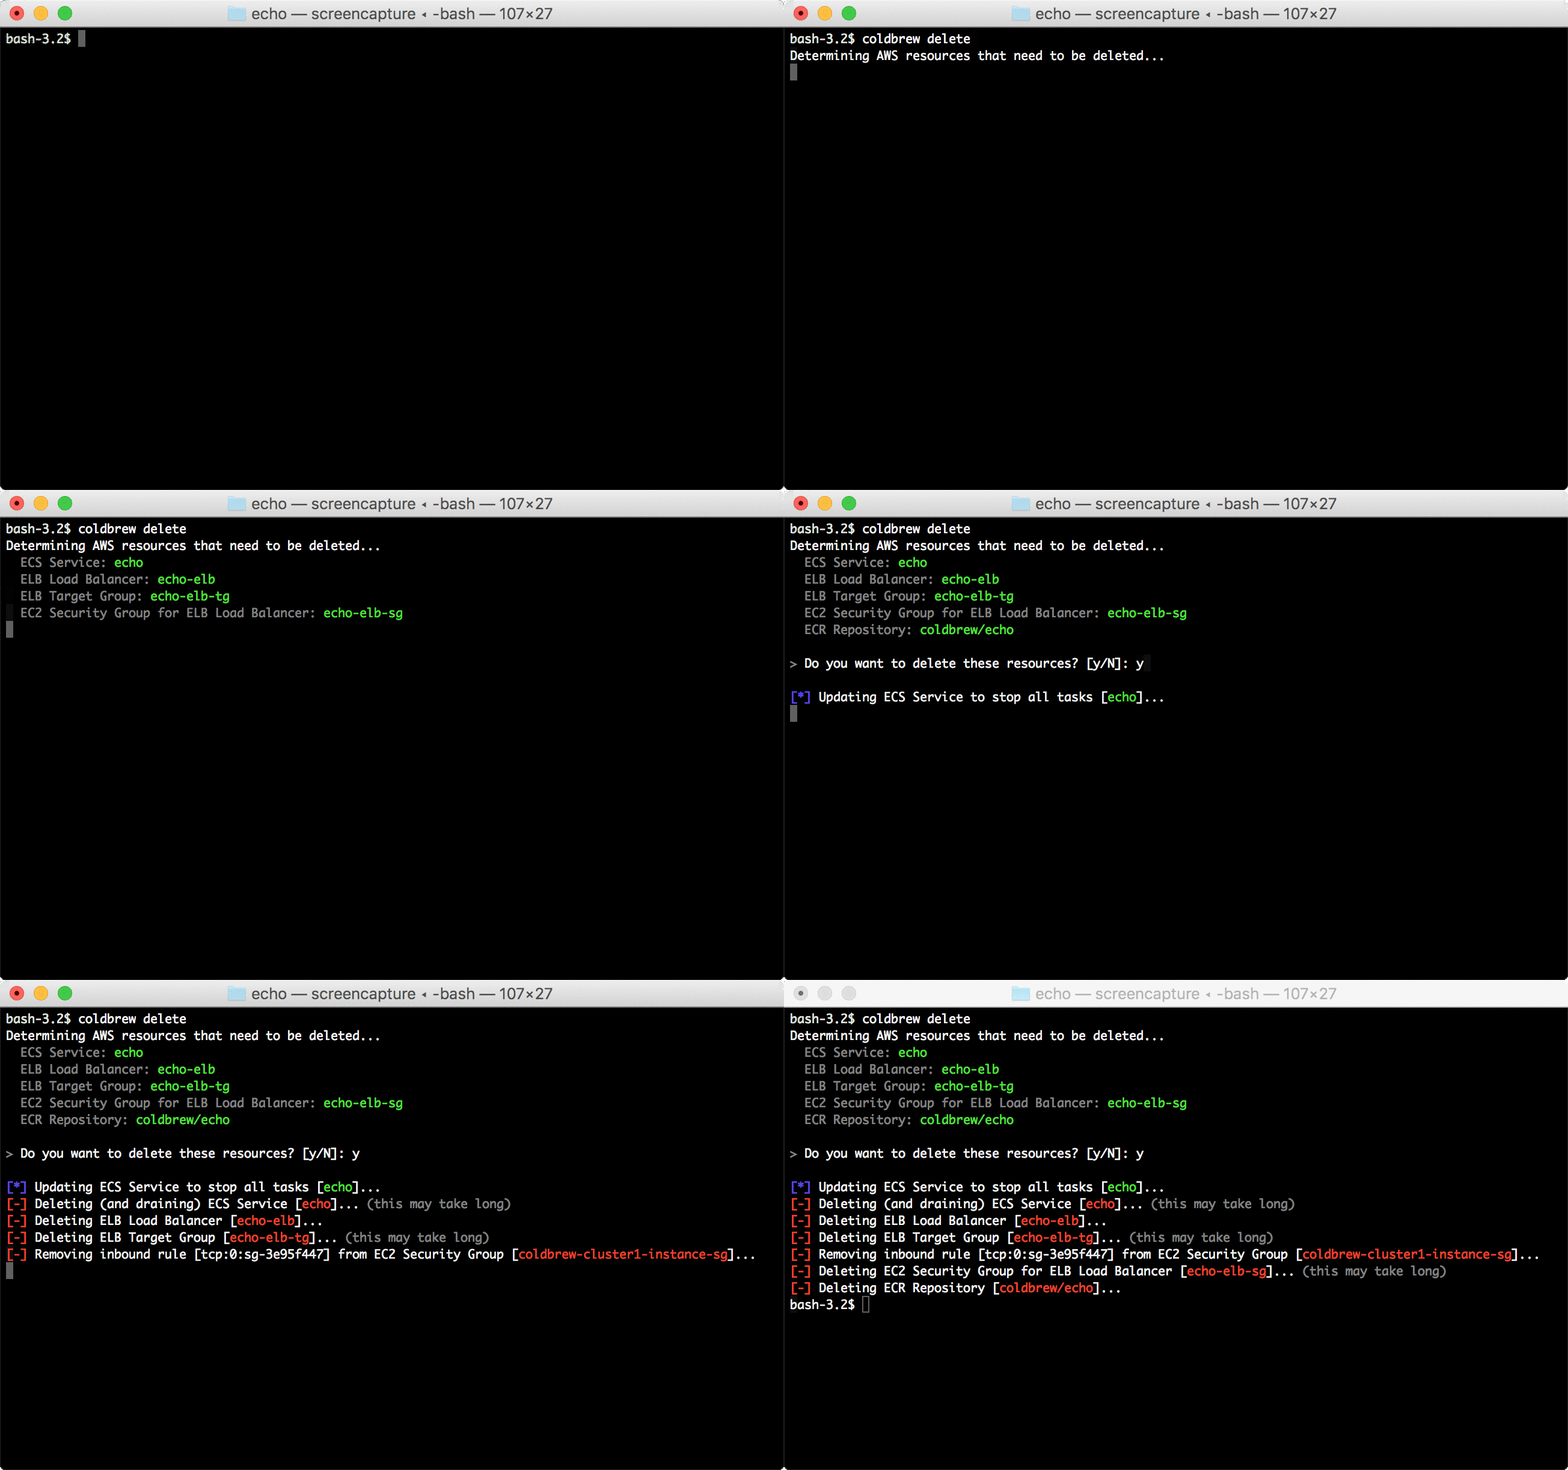
When you no longer need your app, you can remove your app from the cluster using delete command.
coldbrew delete
delete command gathers a list of AWS resources that need to be deleted, and, if you confirm, it will start cleaning them up. It can take several minutes for the full process.
Delete Cluster
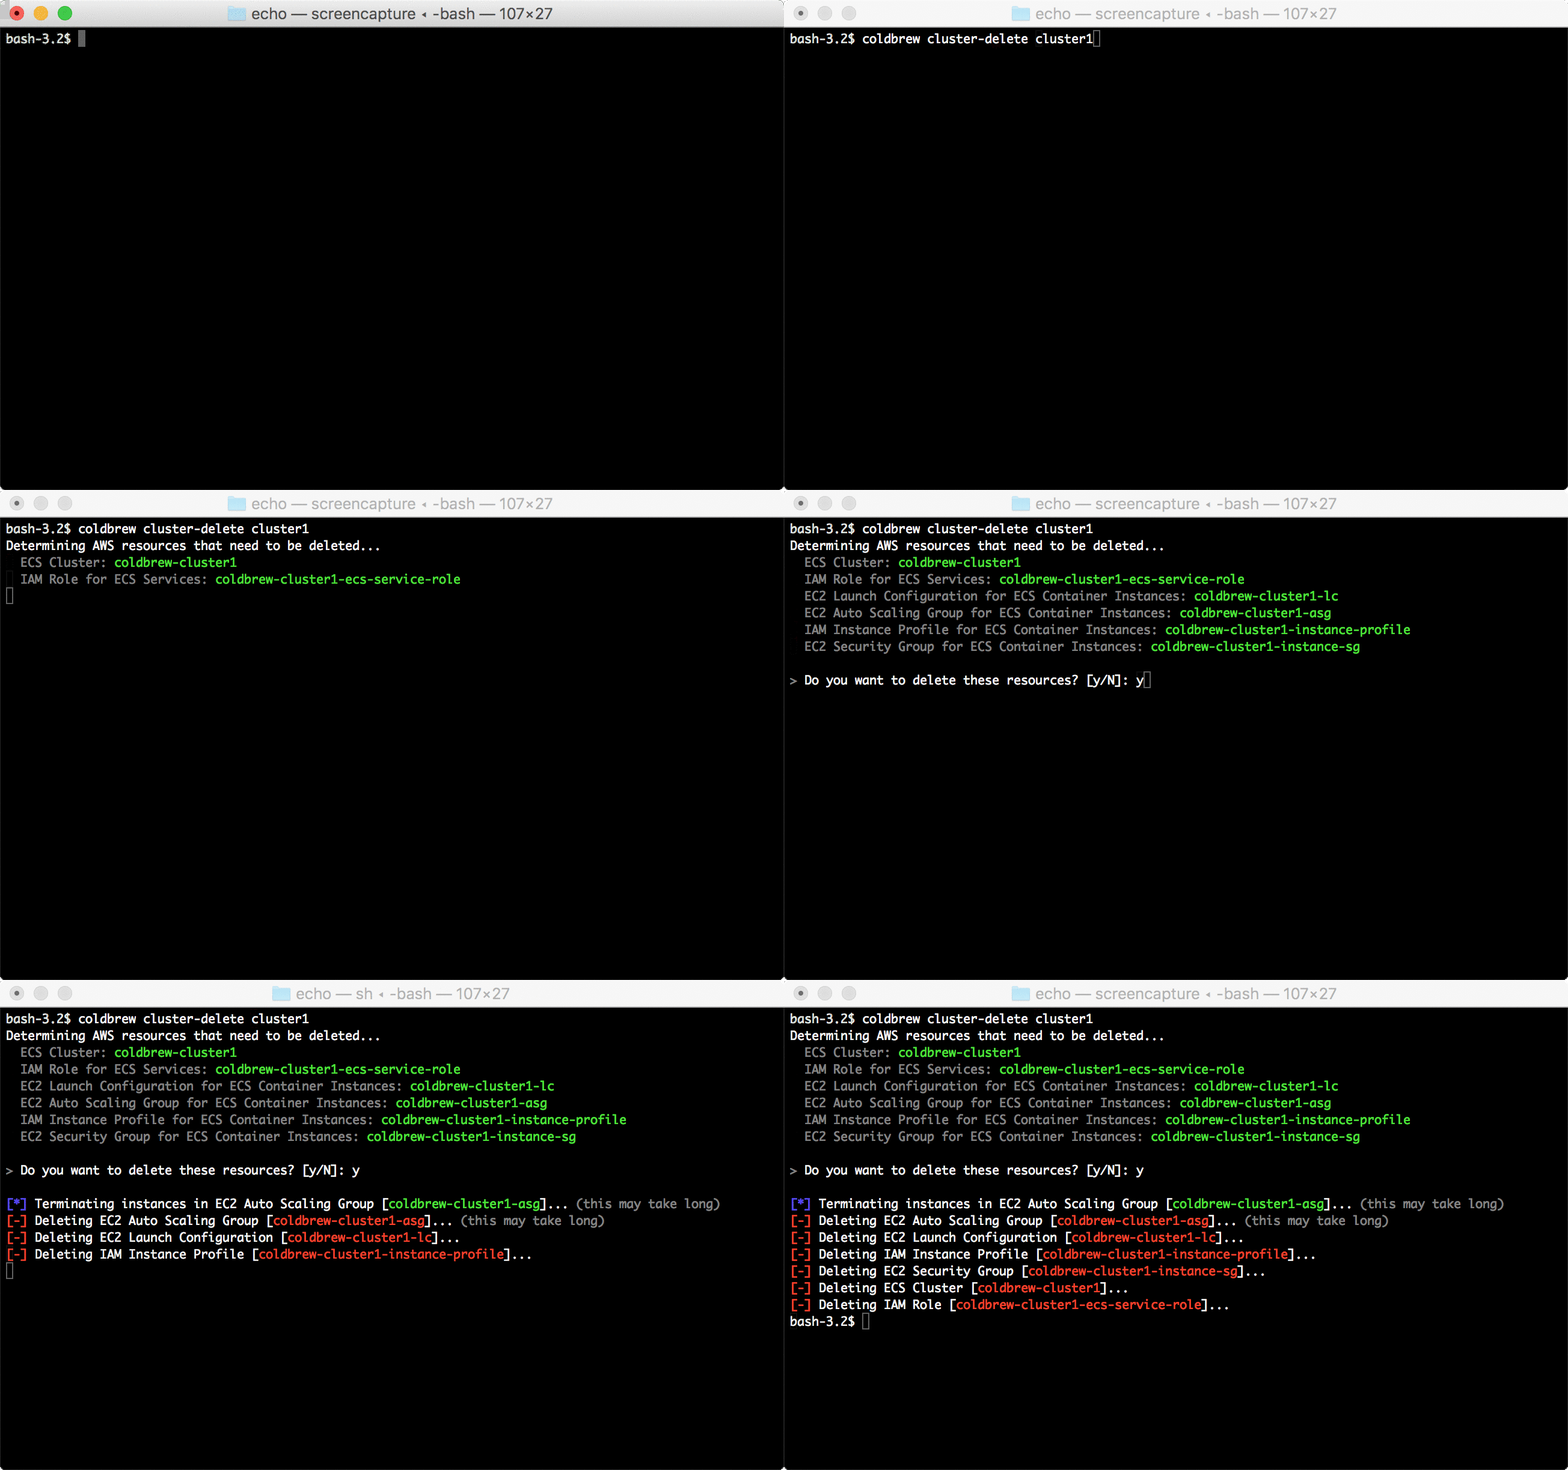
You can use a cluster for more than one apps, but, when you no longer need the cluster, you use cluster-delete command to clean up all the resources.
coldbrew cluster-delete
Similar to delete command, cluster-delete will delete all AWS resources that are no longer needed. It can take several minutes for the full process.
Documentations
 Documentation