ApiCat
English | 简体中文
ApiCat is an AI-powered API development tool that aims to assist developers in building APIs more quickly and efficiently through automation and intelligence. By utilizing ApiCat, developers can save a significant amount of time in the development and management of APIs.
You can visit our Online Demo to try it out.
Features
- API documentation: You can easily create and manage your API documentation
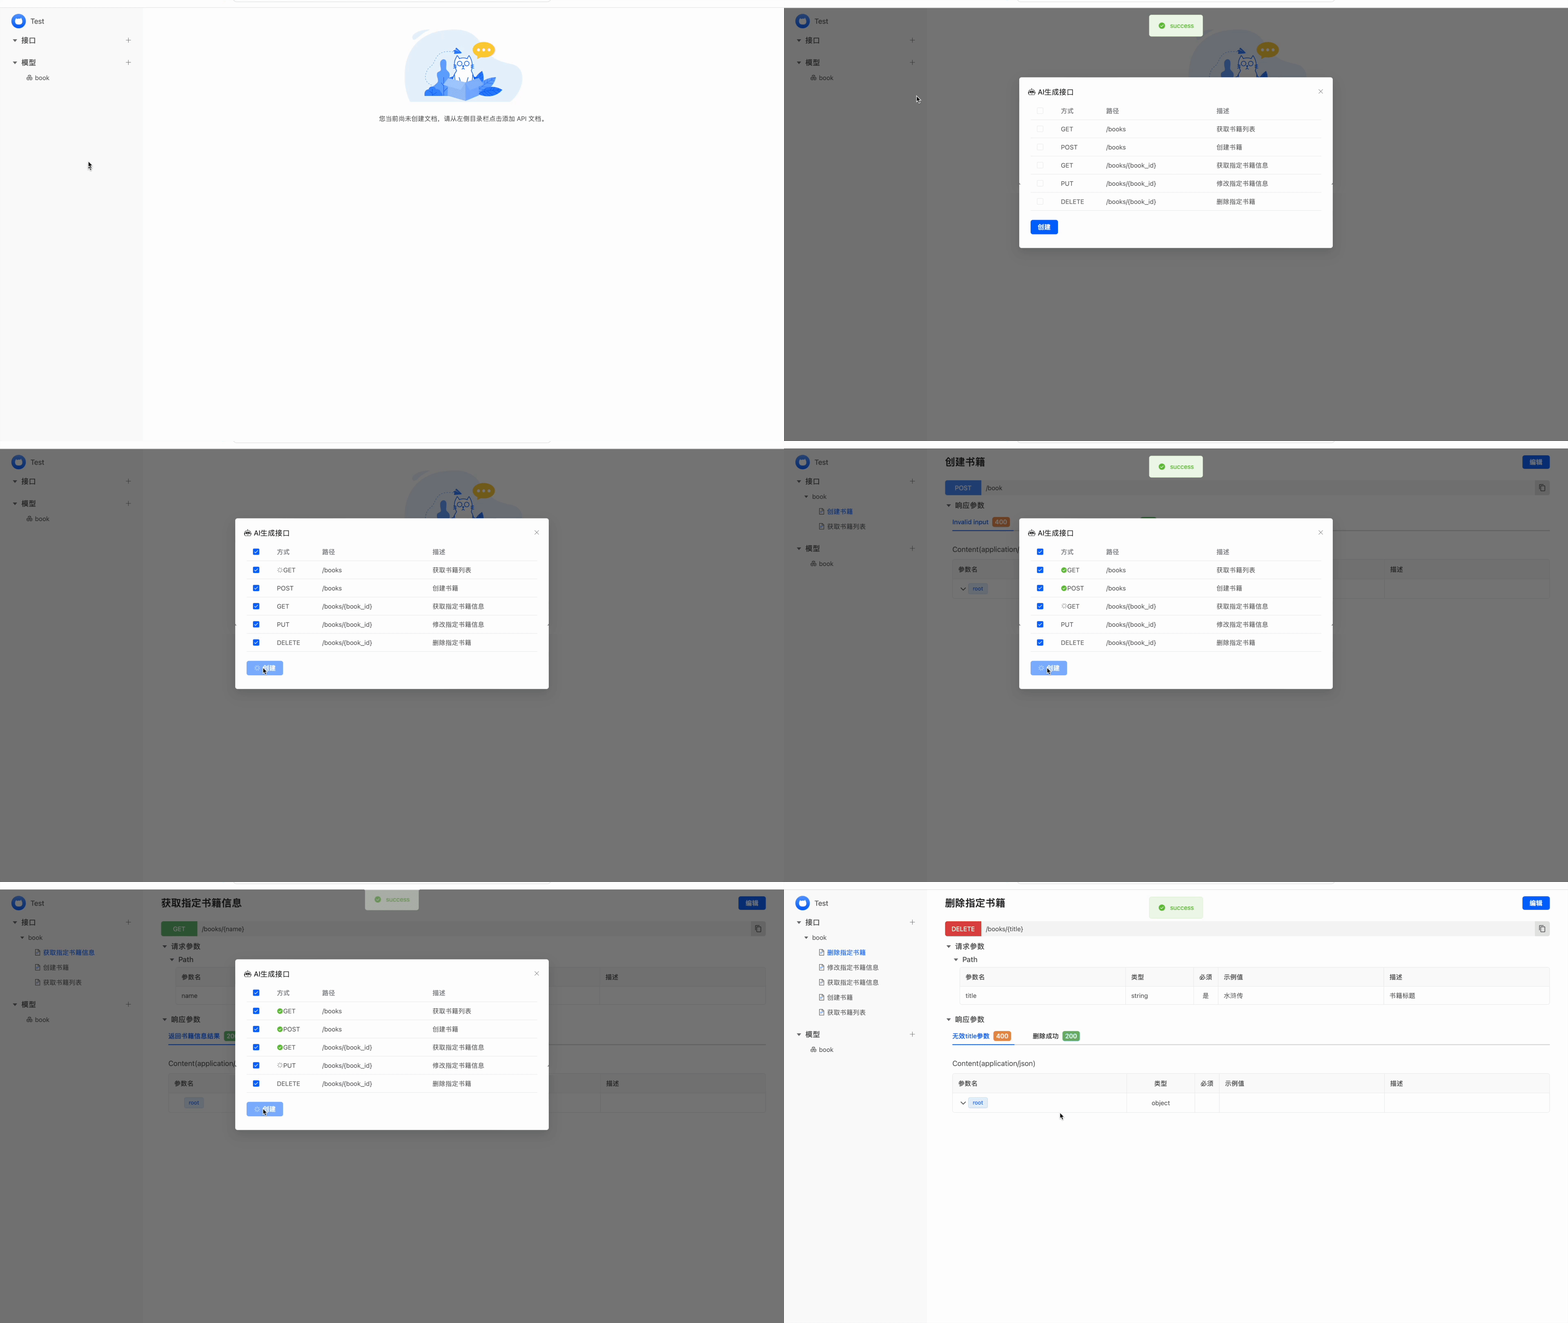
- AI support: You can use AI to help you quickly generate API documentation, models, responses, and other content
- Mock: The user-friendly Mock feature makes API development faster and more efficient
- Iteration: Having a clear iteration plan enables the team to define the scope of API changes, ensuring efficiency and quality in each development task.
- Data import and export: API data can be imported in its entirety into any software that supports OpenAPI or Swagger, and can also be reverse imported into ApiCat.
Installation and deployment
Five installation and deployment methods
1. Download the executable file for deployment
Step 1: Download the pre-packaged executable file
Download the pre-packaged executable file release address
Step 2: Start the service
# Start the service with default configuration or load environment variable configuration
./apicat
# Start the service by using a configuration file
./apicat -c setting.example.yaml
2. DockerHub install
Step 1: Pull image
docker pull natuo/apicat:latest
Step 2: Start the service
docker run --name apicat-server -p 8000:8000 -d --link mysql natuo/apicat:latest -c /app/setting.default.yaml
3. Install on Zeabur
Sign up for a Zeabur account Zeabur, find ApiCat one-click deployment on the Marketplace.
4. Compile the Docker image locally
Step 1: Pull code from github
git clone https://github.com/apicat/apicat.git
Step 2: Build a local image
docker build -t apicat:latest .
Step 3: Start the service
docker run --name apicat-server -p 8000:8000 -d --link mysql natuo/apicat:latest -c /app/setting.default.yaml
5. Install and deploy from source code
Step 1: Pull code from github
git clone https://github.com/apicat/apicat.git
Step 2: Compile the front-end code
cd frontend
pnpm i
pnpm build
Step 3: Compile the backend code
go mod tidy
go build
Step 4: Start the service
# Start the service with default configuration or load environment variable configuration
./apicat
# Start the service by using a configuration file
./apicat -c setting.example.yaml
Configuration options explanation
You can start ApiCat and configure it with custom settings in two ways:
1. Read the configuration file
See the backend/config/setting.example.yaml
2. Load environment variable
| Variable name |
Description |
Example |
| APICAT_APP_NAME |
APP name |
ApiCat |
| APICAT_APP_HOST |
Bound IP address, Default: 0.0.0.0 |
0.0.0.0 |
| APICAT_APP_PORT |
Bound port, Default: 8000 |
8000 |
| APICAT_LOG_PATH |
Log file path, Output to stdout is empty |
logs/ |
| APICAT_LOG_LEVEL |
Log level |
debug |
| APICAT_DB_HOST |
MySQL IP address, required |
127.0.0.1 |
| APICAT_DB_PORT |
MySQL Port, required |
3306 |
| APICAT_DB_USER |
MySQL username, required |
root |
| APICAT_DB_PASSWORD |
MySQL password, required |
123456 |
| APICAT_DB_NAME |
MySQL database name, required |
apicat |
| APICAT_OPENAI_SOURCE |
OpenAI API source(openai, azure) |
openai |
| APICAT_OPENAI_KEY |
OpenAI Key |
sk-xxxxxx |
| APICAT_OPENAI_ENDPOINT |
OpenAI API url, Valid when APICAT_OPENAI_SOURCE is set to "azure" |
https://xxxxxx.openai.azure.com/ |
If you have any topics you would like to discuss or communicate with us, feel free to join our WeChat discussion group.

Screenshot


License
MIT